I made coin purses for gifts this year.
http://gesslerfamily.blogspot.com/2011/05/coin-purses.html
Thursday, May 12, 2011
Thursday, April 21, 2011
Valance to Skirt - Quickie Sewing Project
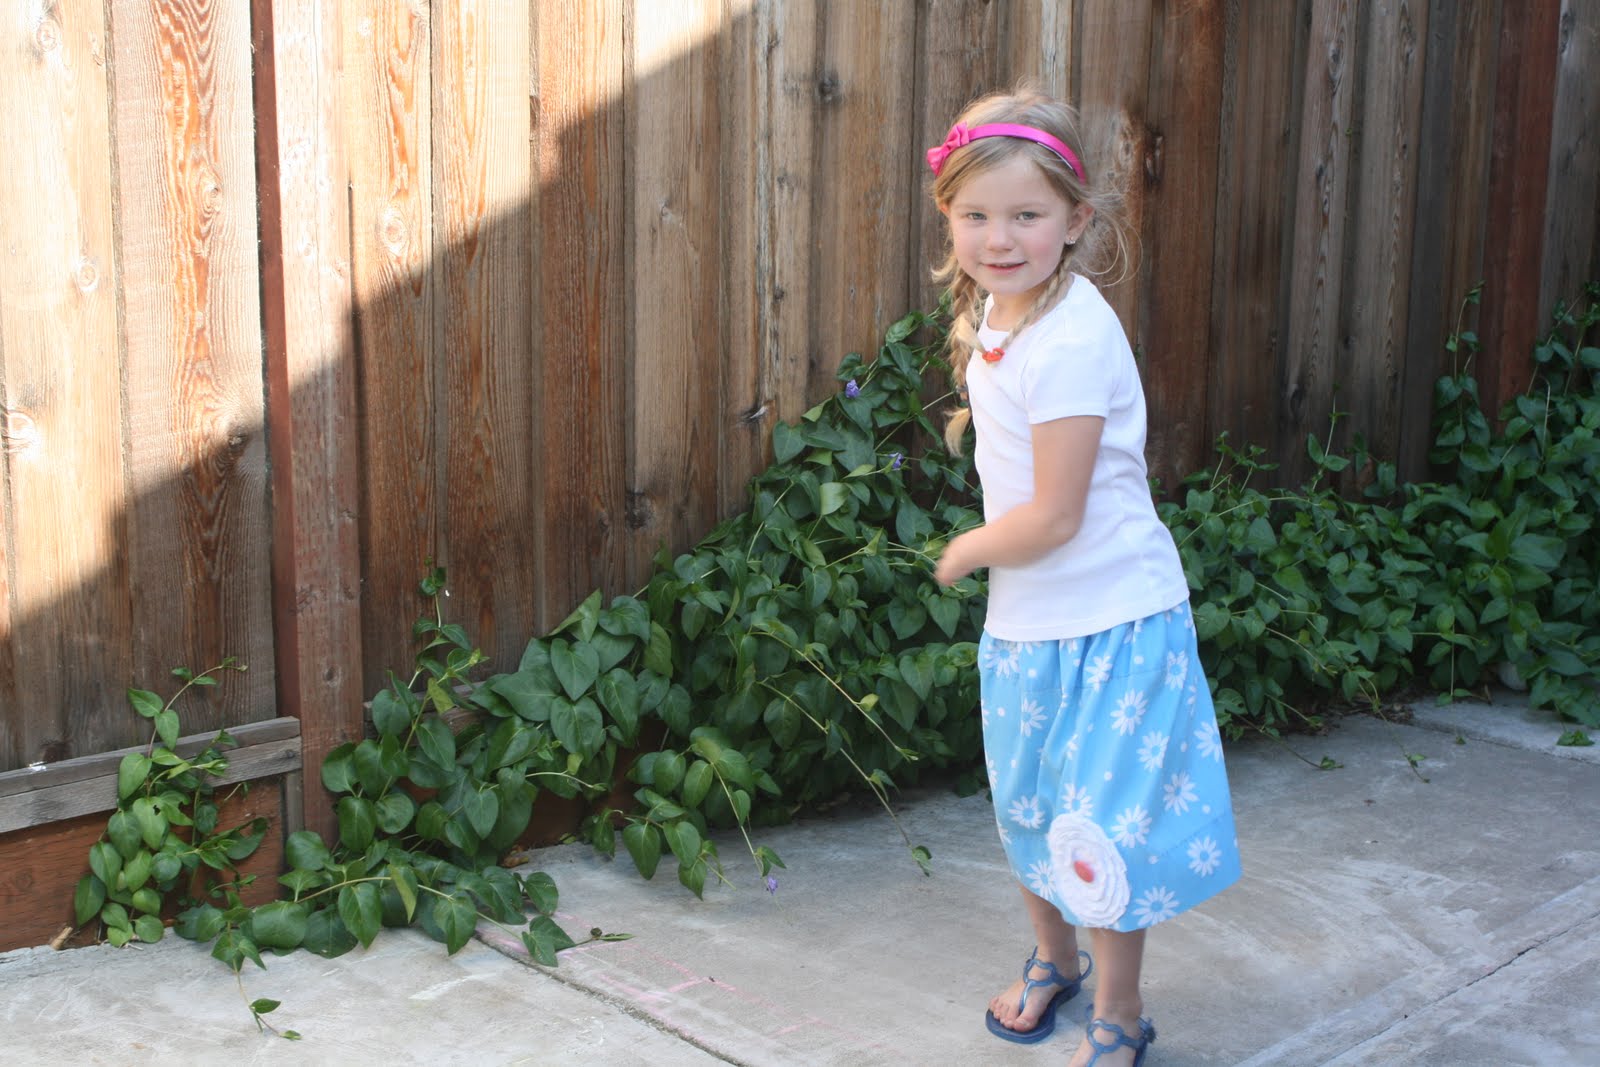
I found this blue flowery Disney window valance a the thrift store for 10 cents and figured it would make a cute skirt. I came across it this morning while going through my fabric bin. It was a quick 10 minute project and turned out cute, but was missing something. So I spent the next half hour making a fabric flower for the front. It's darling. My sewing week is coming to an end, and I haven't even posted all the new stuff I sewed. I'll get to it eventually.
 |
| Before: A cute window valance |
 |
| After: An even cuter skirt |
 |
| With a darling fabric flower |


Wednesday, April 20, 2011
Nursing Cover Roll-Up

I sewed a new nursing cover today. It was a little bit more troublesome than normal. I think it was just operator error. Everything seemed to go wrong and I spent way too much time with my seam ripper. I'm happy it's complete. I made a few small changes from my other ones, I added a second pocket in the other corner and I made both pockets with chenille. The pockets are great for wiping milk from little mouths and to stick the binky in if you need to. I also added a tie so that the cover can roll up to fit easily in a purse or diaper bag.
My original tutorial can be found HERE.

 |
| You can see one of the pockets. |
 |
| August modeled for me |
Tuesday, April 19, 2011
My First Minky Baby Blanket

I saw baby blankets made with Minky dot fabric on etsy and decided to make one for my brand new nephew. I've never sewn with Minky before and it was a little challenging. I read a few tutorials while I was seeking advice on how to sew with the Minky fabric. It's extremely stretchy and I didn't want to mess up. That stuff isn't cheap.
A couple of very helpful tips were to, use a lot of pins (I should have used more), lay the Minky on the rug when cutting and pinning cotton fabric to it, and sew Minky side down.
I really should have used more pins, it appeared that it would have helped maintain better control of the Minky while sewing. If you make one of these make sure you sew very slow.
I used Kate Spain's Central Park Zoo in Aqua, and brown Minky Dot fabric. The finished blanket measures 43"x44".
I'm linking the tutorial I followed here.
I'm going to add a tip because the tutorial says to get your iron nice and hot and press before you top stitch. BE CAREFUL! Don't make your iron too hot it will iron the dots in the Minky away and they don't come back. I accidentally ironed a couple dots out. *sad face* There are a few imperfections in the blanket that I wish weren't there. I'm sure it's only noticeable to me.
Here is the journey from fabric to blanket.
 |
| Cutting and pinning on the rug was super easy |
 |
| It would have been easier to sew with pins between the pins |
 |
 |
| Big blanket. More like toddler size than baby size. That's good though, it will last longer. |
 |
| I love this Central Park Zoo fabric |
I can't wait to see pictures of my nephew with his Minky. I have to send this to him, they live far away. *sniff*
Thursday, March 31, 2011
Dessert and Cake Plates Tutorial

This tutorial is for this lovely two tiered pedestal dessert plate
and cake plates.
This project is so easy it's almost embarrassing.
I found these two adorable plates while I was out shopping. This plate is going to be a birthday gift for my Pastors wife.
You will need two coordinating different sized plates. They can be any shape. And two candle holders for pedestals. You can use a different type of candle holder if you'd like, I just happen to have a few of these on hand.
You will also need Epoxy. I use 5 minute Epoxy, it allows me a little more time than the instant seal kind.


Start with your larger plate and turn it upside down.
You may want to work with a project mat, if the Epoxy gets on anything it will be impossible to get it off.


Before you glue, put the candle stick on the bottom of the plate to get a feel for where the center is. You could even put a small pencil mark down to use as a guide. I lucked out on this plate it had a perfect size square outline right at the center.
Mix the Epoxy according to the directions. I prefer to mix it on cardboard and then mix and apply it with a toothpick.
Spread the Epoxy on the top of the candle stick holder. Be sure to work quickly, it will dry fast. Be careful.

Attach the candlestick holder to the bottom of your plate. Let it sit for about 10-15 minutes before you turn it upside down.
Move it to the side and get your smaller plate.

Do the same to the small plate as you did to the large one.
Except this time, attach the candlestick holder the opposite way, with the bottom attached to the plate.

Let this also sit about 10-15 minutes to dry. You will have to mix more Epoxy when you attach the tiers together.
Turn the large plate over and stand it up. Place the smaller one on top and center it. I placed a teeny tiny pencil mark where I needed it to line up. Don't make the mark too big or dark, you will not be able to erase it after the candlestick holder is attached.
Use your Epoxy to attach the top tier to the bottom tier.
Let sit for 24 hours before you use. It can be washed with hot water and dish soap like any normal plate.

You can use the same instructions to make single cake or dessert plates. It's so simple. And they are so pretty.


Wednesday, March 30, 2011
Giraffe Diaper Cake and Frog Diaper Wreath
This is my newest diaper cake and diaper wreath. Each one turns out different. I loved this one.
My Diaper Cake tutorial can be found here.
My Diaper Wreath tutorial can be found here.


My Diaper Cake tutorial can be found here.
My Diaper Wreath tutorial can be found here.
Giraffe Diaper Cake for Baby Boy

 |
| I hot-glued a bow to the back of the ribbon to cover the seam left by the receiving blanket. This is also something I haven't done before. |
 |
I added bibs to the second tier, this is something I haven't done before. |
Frog Diaper Wreath for Baby Boy
 |
| There are 8 washcloths tied on |
 |
| This time I wrapped a grosgrain ribbon around the wreath. It made it look a lot better. It was also easier to attach the diapers. |
The following pictures are all of the items hidden in the diaper cake.


Saturday, March 19, 2011
Crayon Roll Gifts
I made crayon rolls for all of our nieces, nephews and neighbor friends as gifts for Christmas and birthdays. They are so quick and easy now.


Subscribe to:
Posts (Atom)